


Welcome to our blog post where we unveil the secrets to mastering the art of making the perfect Panettone in your kitchen. Get ready to embark on a delightful journey as we share expert tips, techniques, and a step-by-step guide to ensure your homemade Panettone rivals those from the finest Italian bakeries. Whether you’re a novice or an experienced baker, our comprehensive guide will equip you with the knowledge and skills to create this iconic Italian sweet bread with precision and finesse. Get ready to impress your loved ones with an authentic and delectable Panettone that will leave them craving for more. Let’s dive in and unlock the secrets to Panettone perfection!
Unveiling the Secrets to Mastering the Art of Making the Perfect Panettone in Your Kitchen
Introduction
Have you ever experienced the joy of baking your own Panettone bread from scratch? The process might seem intimidating at first, but with the right recipe and a little patience, you can create a mouthwatering Italian delicacy that will impress your friends and family. In this article, we will guide you through the step-by-step process of making a homemade Panettone bread that is perfect for holidays and celebrations. Get ready to tantalize your taste buds as we unravel the flavors and aromas of this incredible bread.
The Flavors and Aromas That Make Panettone Bread Irresistible
One of the reasons why Panettone bread is so popular is its distinct flavors and aromas. The bread is infused with a harmonious blend of honey, orange zest, lemon zest, vanilla beans, and dark rum. These aromatic ingredients come together to create a symphony of scents that will waft through your kitchen and entice anyone who walks by.
The Three Doughs That Bring Panettone Bread to Life
The First Dough (Biga)
To make the perfect Panettone bread, we start with the first dough, also known as the “Biga.” This dough is made by combining bread flour, sugar, yeast, and water. The Biga acts as a starter and enhances the flavor and texture of the final bread.
The Second Dough
Once the Biga is ready, it’s time to move on to the second dough. This is where the magic happens. In addition to the bread flour, sugar, yeast, and water, we add the Biga, egg yolks, and butter to create a rich and buttery dough. This dough is essential for achieving the soft and fluffy texture that Panettone bread is known for.
The Third Dough
The final dough, known as the third dough, brings all the flavors together. It consists of the second dough, bread flour, salt, sugar, egg yolks, butter, and chocolate chips. The addition of chocolate chips adds a delightful surprise to every bite, making the Panettone bread even more irresistible.
The Step-by-Step Process of Making the Perfect Panettone Bread
Now that we have familiarized ourselves with the different doughs, let’s dive into the step-by-step process of making the perfect Panettone bread. Remember to take your time and enjoy the journey of creating this culinary masterpiece.
-
Prep Time: Set aside approximately 1 hour for the preparation of the ingredients and equipment.
-
Resting Time: The dough requires ample time to rest and develop its flavors. Allow for a total resting time of 40 hours, which includes fermentation and proofing.
-
Mixing the Dough: Start by mixing the ingredients for the Biga. Once the Biga has fermented for the required time, move on to the second dough, followed by the third dough.
-
Kneading: Use your hands or a stand mixer to knead the dough until it becomes smooth and elastic. This process helps develop the gluten, giving the bread its characteristic structure.
-
Proofing: Allow the dough to rise in a warm and draft-free area until it has doubled in size. This process can take several hours, so be patient.
-
Adding Chocolate Chips: Towards the end of the proofing stage, gently fold in the chocolate chips. This will ensure that they are evenly distributed throughout the bread.
-
Shaping: Carefully shape the dough into a round loaf and place it in a Panettone paper mold or a tall cylindrical pan. This helps the bread maintain its iconic shape as it rises further.
-
Baking: Preheat your oven to 350°F with the convection fan on, and bake the Panettone bread for approximately 50-55 minutes. The bread should have a golden brown crust and a light, airy interior.
-
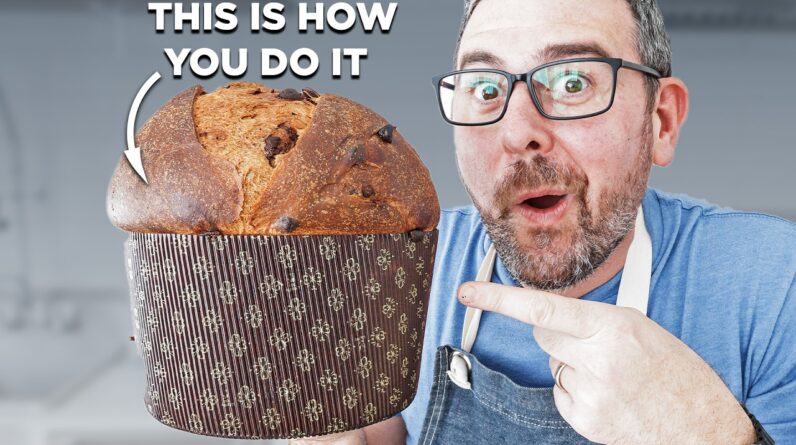
Serving: Once fully baked, remove the Panettone bread from the oven and let it cool completely. To serve, slice the bread and flip each slice over to reveal the beautiful domed shape.
FAQs (Frequently Asked Questions)
-
Can I prepare the dough in advance? Yes, you can prepare the dough in advance and let it rest in the fridge overnight. This can help develop the flavors further.
-
Can I substitute the chocolate chips with other ingredients? Absolutely! You can experiment with different additions such as dried fruits, nuts, or candied orange peel to customize your Panettone bread.
-
Do I need any special equipment to make Panettone bread? While using Panettone molds can help achieve an authentic shape, you can use other tall cylindrical pans or even cake pans if you don’t have specific molds.
-
How long will the Panettone bread stay fresh? Properly stored Panettone bread can stay fresh for up to a week. It is best kept in an airtight container at room temperature.
-
Can I freeze Panettone bread? Yes, you can freeze Panettone bread. Wrap it tightly in plastic wrap and place it in a freezer-safe bag or container. It will stay fresh for up to three months.
Conclusion
Now that you have the keys to unlock the secrets of making the perfect Panettone bread, it’s time to put your newfound knowledge into action. Embrace the aromas, flavors, and textures as you embark on a culinary adventure in your own kitchen. With a little practice, you’ll soon be able to create this Italian delicacy that is certain to impress your loved ones. So grab your apron, gather your ingredients, and let the baking begin!